Why You Should Get Your Air Ducts Cleaned?
Professional Air Duct Cleaning Services for a Healthier Home Indoor air quality plays a major role in your family’s health and comfort. Over time, dust, debris, pet dander, allergens, and even mold spores can build up inside your air duct system. When your HVAC system runs, these contaminants are circulated throughout your home or business. That’s where Air Duct Clinic comes in. Why Air Duct Cleaning Is Important Many homeowners don’t realize how much buildup can accumulate inside their ductwork. Professional air duct cleaning offers several key benefits: If your home has recently undergone renovations, you’ve noticed excessive dust, or it’s been years since your last duct cleaning, it may be time to schedule a professional service. Our Air Duct Cleaning Process At Air Duct Clinic, we use professional equipment and proven techniques to thoroughly clean your entire air duct system. Our process includes: We focus on doing the job right, not rushing through it. Our goal is to help you breathe cleaner air and protect the longevity of your HVAC system. Residential & Commercial Air Duct Cleaning Whether you’re a homeowner or business owner, clean air ducts matter. We provide air duct cleaning services for both residential and commercial properties, helping homes and workplaces maintain healthier indoor environments. Schedule Your No-Obligation Quote Today If you’re searching for reliable, professional air duct cleaning services, Air Duct Clinic is here to help. We’re committed to quality service, honest recommendations, and customer satisfaction. 📞 Call us today for a no-obligation quote at 770-351-2777 Breathe easier knowing your air ducts are clean and your indoor air is healthier.
How to Perform HVAC Maintenance: A Complete Guide
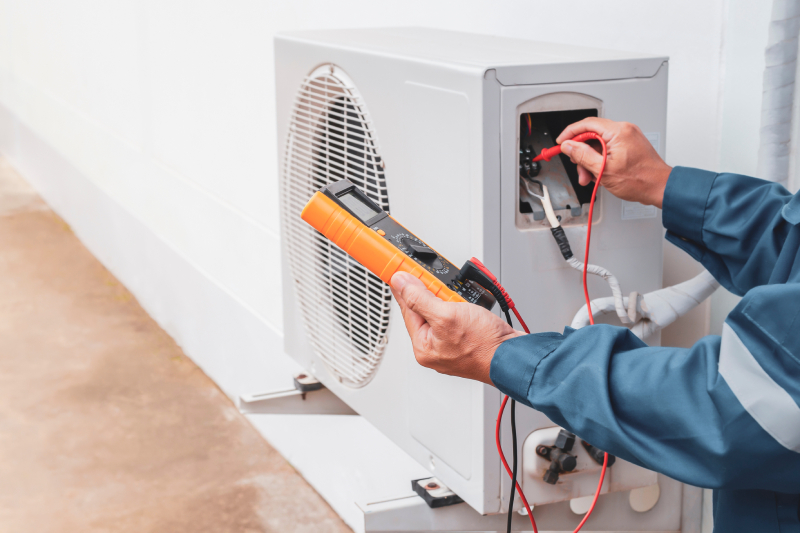
Introduction HVAC systems are essential for maintaining comfortable indoor temperatures and good air quality. Regular maintenance extends the lifespan of your system, enhances efficiency, and prevents costly repairs. Neglecting HVAC maintenance can lead to higher energy bills, system failures, and poor air quality. In this guide, Air Duct Clinic will walk you through essential HVAC maintenance tasks, ensuring optimal system performance year-round. Call us to get a no obligation quote 770-351-2777 today! Why HVAC Maintenance is Important Enhances System Efficiency A well-maintained HVAC system operates efficiently, reducing energy consumption and lowering utility bills. Dirty filters, clogged vents, and worn-out components force the system to work harder, increasing energy costs. Prevents Costly Repairs Routine maintenance helps identify minor issues before they escalate into expensive repairs. Replacing air filters, cleaning coils, and checking refrigerant levels can prevent breakdowns and extend the lifespan of your unit. Improves Indoor Air Quality HVAC systems circulate air throughout your home, and a dirty system can distribute dust, allergens, and mold spores. Regular cleaning and filter replacements help maintain healthy indoor air quality. Extends Equipment Lifespan HVAC systems are a significant investment, and proper maintenance ensures they last longer. Regular servicing helps avoid premature system replacements. How Often Should HVAC Maintenance Be Performed? Seasonal HVAC Maintenance Schedule Signs Your HVAC System Needs Maintenance If you experience any of these issues, schedule an HVAC inspection immediately. Essential Tools & Materials for HVAC Maintenance Step-by-Step Guide: How to Maintain Your HVAC System Step 1: Turn Off Power to the System Before performing any maintenance, shut off power to the unit to avoid electrical hazards. Locate the breaker switch and turn it off. Step 2: Replace or Clean Air Filters Air filters trap dust, pollen, and debris, preventing them from circulating through your home. Check filters monthly and replace them at least every 90 days for optimal performance. Step 3: Clean the Condenser and Evaporator Coils Dirt buildup on coils reduces efficiency. Use a coil cleaner spray and gently brush off debris. Keeping coils clean helps the system cool and heat efficiently. Step 4: Inspect and Clean Air Ducts Dust, mold, and debris can accumulate in air ducts, restricting airflow. Regular duct cleaning improves air quality and system efficiency. Step 5: Check Refrigerant Levels Low refrigerant levels can impact cooling efficiency. If you suspect a leak, contact an HVAC professional for a refill and system inspection. Step 6: Clean and Clear Drain Lines Condensation from the system flows through drain lines. Over time, they can become clogged with algae and debris. Flush the lines with a mixture of vinegar and water to prevent blockages. Step 7: Inspect and Lubricate Moving Parts Fans, motors, and belts require proper lubrication to reduce wear and tear. Apply lubricant to moving parts to ensure smooth operation. Step 8: Test the Thermostat Ensure your thermostat is functioning correctly by setting it to different temperatures. If it’s not responding properly, consider upgrading to a programmable or smart thermostat for better energy efficiency. Step 9: Check Electrical Connections Loose or damaged electrical connections can cause system malfunctions. Tighten connections and inspect wires for any signs of wear or corrosion. Step 10: Schedule Professional HVAC Maintenance While DIY maintenance is beneficial, hiring a professional HVAC technician annually ensures a thorough inspection and servicing of the system. DIY vs. Professional HVAC Maintenance When DIY Maintenance is Sufficient If your HVAC system is in good condition, simple maintenance tasks such as filter replacement, coil cleaning, and thermostat checks can be done without professional help. When to Call a Professional For refrigerant handling, complex electrical repairs, or system diagnostics, it’s best to hire a licensed HVAC technician. Professionals have specialized tools and expertise to ensure proper servicing. Maintaining HVAC Efficiency Year-Round Seal Duct Leaks Leaky ducts reduce system efficiency by allowing air to escape. Seal leaks with HVAC tape to improve airflow and reduce energy waste. Optimize Airflow Keep vents unblocked and ensure proper airflow by maintaining at least a foot of clearance around HVAC units. Upgrade to an Energy-Efficient System If your HVAC system is over 15 years old, consider upgrading to an ENERGY STAR-certified model to reduce energy consumption and costs. Government Guidelines on HVAC Maintenance According to the U.S. Department of Energy (DOE), routine HVAC maintenance can improve energy efficiency by up to 15% and extend equipment lifespan. The DOE recommends scheduling annual professional inspections. (Reference: Energy.gov) Conclusion Regular HVAC maintenance is essential for ensuring comfort, efficiency, and safety in your home. Whether performing simple DIY maintenance or hiring a professional, keeping your system clean and functional saves energy and prevents costly repairs. Trust Air Duct Clinic for expert HVAC maintenance services tailored to your needs. Call us to get a no obligation quote 770-351-2777 today!
How to Clean a Chimney and Fireplace: A Step-by-Step Guide
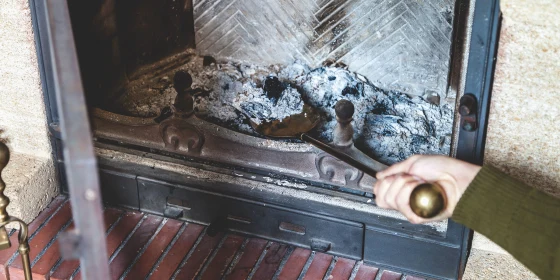
Introduction A clean chimney and fireplace not only ensure a warm and cozy home but also prevent dangerous hazards such as chimney fires and carbon monoxide buildup. Over time, soot, creosote, and debris accumulate, reducing efficiency and increasing risks. Regular maintenance is essential for keeping your chimney and fireplace safe. In this guide, Air Duct Clinic will walk you through the best methods for cleaning, maintaining, and ensuring optimal performance of your chimney and fireplace. Call us to get a no obligation quote 770-351-2777 today! Why Is Chimney and Fireplace Cleaning Important? Prevents Chimney Fires One of the primary reasons to clean your chimney regularly is to prevent fires. Creosote, a highly flammable byproduct of burning wood, builds up inside the flue and can ignite under high temperatures. Routine cleaning removes creosote buildup and reduces the risk of chimney fires. Improves Air Quality and Efficiency A clogged chimney can restrict airflow, causing smoke, ash, and harmful gases to enter your home. A clean chimney allows proper ventilation, ensuring efficient burning and maintaining indoor air quality. It also helps improve heat efficiency, reducing energy costs. Prevents Carbon Monoxide Poisoning Blockages from soot, creosote, or debris can prevent proper ventilation, leading to the accumulation of carbon monoxide (CO). This odorless and colorless gas can be deadly when inhaled in large amounts. Regular cleaning ensures that harmful gases exit safely through the chimney. Extends the Lifespan of Your Chimney Soot and acidic byproducts can corrode your chimney lining, leading to costly repairs. Regular cleaning and inspections help maintain the integrity of the structure, prolonging its lifespan and saving money in the long run. How Often Should You Clean Your Chimney and Fireplace? General Cleaning Recommendations The National Fire Protection Association (NFPA) recommends having your chimney inspected at least once a year and cleaned as needed. The frequency of cleaning depends on factors such as usage, type of fuel, and chimney condition. Signs Your Chimney Needs Cleaning If you notice any of these signs, it’s time to clean your chimney or seek professional assistance. Tools & Materials Needed for Chimney and Fireplace Cleaning Step-by-Step Guide: How to Clean a Chimney and Fireplace Step 1: Prepare the Area Before you begin, lay down drop cloths or plastic sheets around the fireplace to protect flooring and furniture from dust and soot. Wear protective gloves, goggles, and a dust mask to avoid inhaling harmful particles. Step 2: Remove Ash and Debris Use a metal bucket to scoop out ash and debris from the fireplace. A vacuum with a HEPA filter can help remove fine dust and soot. Clearing out the firebox ensures better access for a thorough cleaning. Step 3: Inspect the Chimney and Flue Shine a flashlight inside the chimney and check for soot, creosote buildup, cracks, or blockages. Look for nests, leaves, or debris that may obstruct airflow. If you notice significant buildup, it’s best to proceed with cleaning or hire a professional for severe cases. Step 4: Brush the Chimney Liner Attach a chimney brush to extension rods and insert it into the flue from the fireplace opening. Use an up-and-down scrubbing motion to dislodge soot and creosote. Continue until the flue walls are clean. For better access, you can also clean from the rooftop downwards. Step 5: Clean the Firebox and Grate Use a wire brush to scrub the firebox, removing any stubborn soot deposits. Clean the fireplace grate separately by scrubbing it with a stiff brush and warm, soapy water. Rinse and dry before placing it back in the fireplace. Step 6: Check and Clean the Damper The damper controls airflow and should be inspected for damage or rust. Wipe it clean using a damp cloth and ensure it moves freely. Step 7: Clear the Chimney Cap and Exterior Go outside and check the chimney cap for blockages. Remove any accumulated debris or nests. Ensuring proper ventilation at the top prevents future obstructions. Step 8: Dispose of Waste Properly Seal soot and creosote waste in a metal container before disposing of it. Never dump ashes in a plastic or combustible bin, as embers may still be active. DIY vs. Professional Chimney Cleaning When DIY Cleaning is Enough If your chimney has minimal buildup and no structural damage, DIY cleaning is a cost-effective option. Regular maintenance can keep your fireplace safe and efficient. When to Call a Professional For heavy creosote buildup, structural damage, or chimney blockages, hiring a certified chimney sweep is recommended. Professionals use specialized tools and techniques to ensure a deep clean and thorough inspection. Maintaining a Clean Chimney and Fireplace Use Seasoned Firewood Burn only dry, well-seasoned hardwood to minimize creosote buildup. Avoid burning treated wood, paper, or other materials that produce excess soot. Install a Chimney Cap A chimney cap prevents debris, animals, and moisture from entering the flue, reducing blockages and corrosion. Schedule Annual Inspections Regular professional inspections help detect early issues, ensuring your chimney remains safe and functional. Government Guidelines on Chimney Safety According to the U.S. Consumer Product Safety Commission (CPSC), thousands of chimney-related fires occur each year due to poor maintenance. The CPSC recommends routine inspections and proper cleaning to prevent hazardous conditions. (Reference: CPSC.gov) Conclusion A clean chimney and fireplace are crucial for home safety, efficiency, and comfort. Regular maintenance helps prevent chimney fires, improves indoor air quality, and enhances heating efficiency. Whether you choose to clean your chimney yourself or hire professionals, keeping up with routine care ensures long-term benefits. For expert chimney cleaning services, trust Air Duct Clinic to provide top-quality maintenance and safety solutions. Call us to get a no obligation quote 770-351-2777 today!
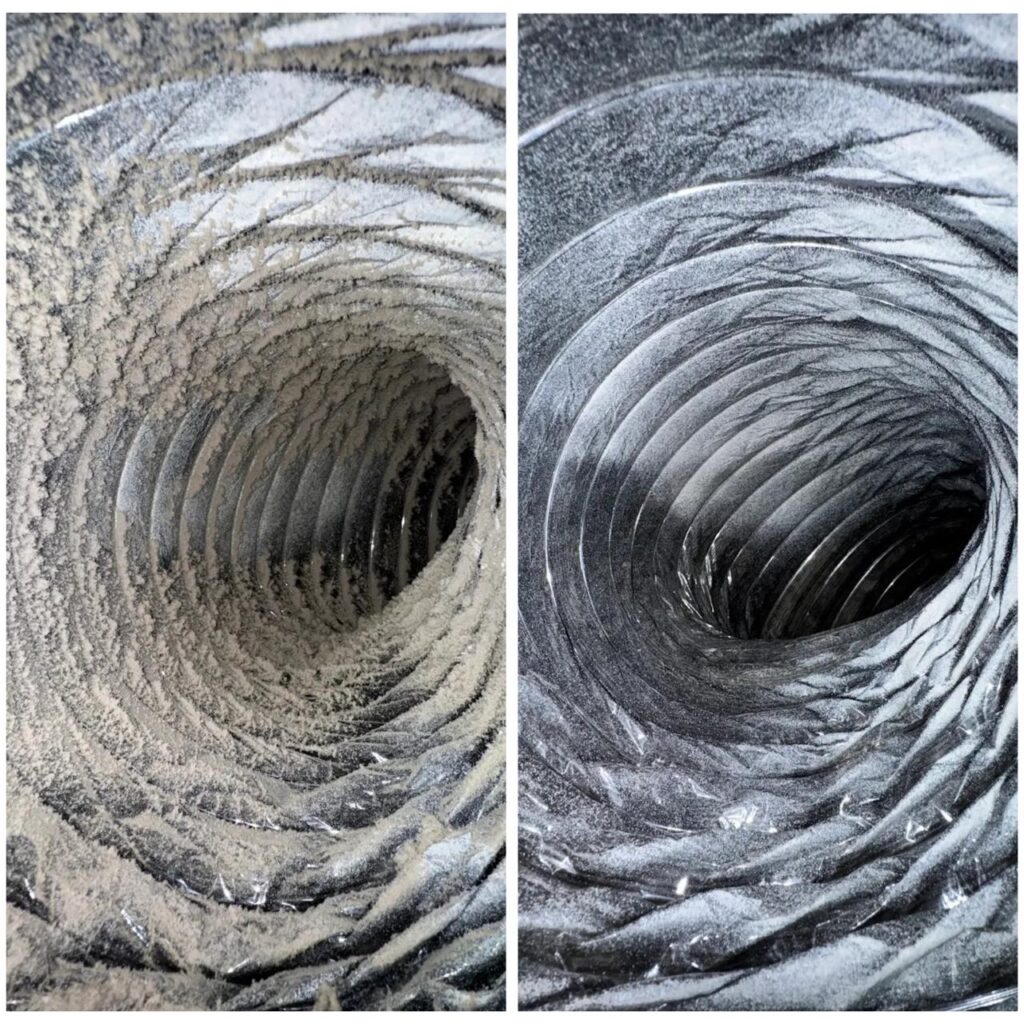
How to Clean Air Ducts: A Step-by-Step Guide for a Healthier Home
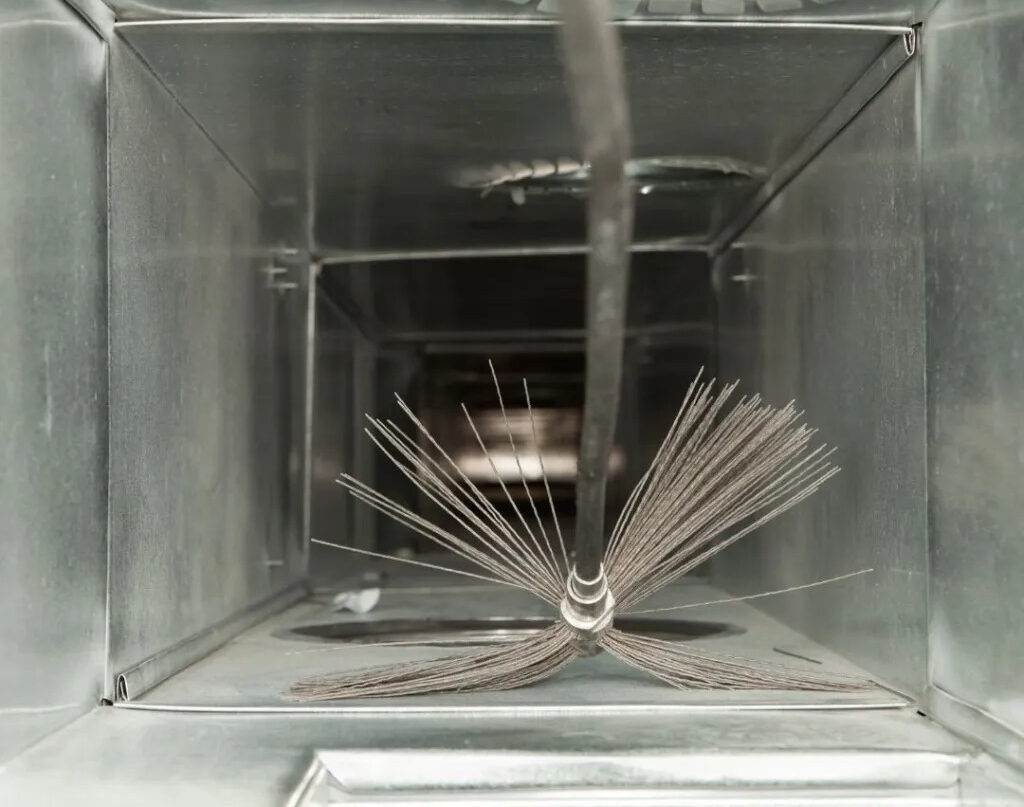
Introduction Maintaining clean air ducts is essential for improving indoor air quality, boosting HVAC efficiency, and ensuring a healthier living environment. Over time, air ducts accumulate dust, allergens, and even mold, which can circulate throughout your home and negatively impact respiratory health. Cleaning your air ducts properly can prevent these issues, making your home safer and more comfortable. In this guide, Air Duct Clinic will walk you through the steps to clean air ducts, when to hire professionals, and the benefits of regular maintenance. Call us to get a no obligation quote 770-351-2777 today! Why Clean Your Air Ducts? Benefits of Clean Air Ducts Clean air ducts contribute significantly to indoor air quality by removing contaminants such as dust, pollen, and pet dander that can accumulate in the ductwork. This helps in reducing allergy symptoms and respiratory problems. Additionally, removing debris from air ducts enhances HVAC system efficiency, leading to lower energy bills. Mold and mildew growth within ducts can also be a serious concern, as they may release spores into the air, affecting those with asthma or allergies. Regular cleaning prevents these issues and extends the lifespan of your HVAC system. Signs Your Air Ducts Need Cleaning There are several indicators that your air ducts require cleaning. If you notice excessive dust buildup around vents and registers, it may be a sign that your ducts are clogged. Unexplained allergy symptoms, frequent sneezing, or respiratory problems can also indicate that contaminants are circulating through your HVAC system. Mold growth inside ducts is another serious concern that requires immediate attention. If your home has persistent musty odors or you experience inconsistent airflow, these could be indications that it’s time to clean your air ducts. How Often Should You Clean Your Air Ducts? Experts recommend cleaning air ducts every three to five years under normal conditions. However, homes with pets, allergy sufferers, or high dust levels may need more frequent cleaning, ideally once a year. If you’ve recently completed a home renovation project or experienced mold contamination, an immediate air duct cleaning is recommended to remove potential irritants. Tools & Materials Needed for Air Duct Cleaning Before starting the cleaning process, you will need a few essential tools. A high-powered vacuum equipped with a HEPA filter is crucial for effectively removing dust and debris from the ducts. A soft-bristle brush can be used to dislodge dirt from duct surfaces. A screwdriver will be necessary for removing vent covers, while a microfiber cloth can help wipe down surfaces. It’s also recommended to replace your furnace filter during the cleaning process to ensure the HVAC system continues to run efficiently. For deeper cleaning, some may opt for compressed air tools to remove stubborn debris. How to Clean Air Ducts (Step-by-Step Guide) Step 1: Turn Off Your HVAC System Before beginning, turn off your HVAC system to prevent dust and debris from being blown into your living spaces while cleaning. This ensures safety and prevents contaminants from spreading throughout your home. Step 2: Remove and Clean Vent Covers Using a screwdriver, carefully remove all vent covers. These covers can accumulate dust and grime, so wash them with warm, soapy water and let them dry completely before reinstalling. Cleaning the vents regularly prevents dust from immediately re-entering the duct system. Step 3: Loosen Dust and Debris in the Ducts Use a soft-bristle brush to gently loosen dust and dirt clinging to the duct walls. Avoid using excessive force, as this could damage the duct lining. If you have flexible ducts, be extra careful to prevent tearing the material. Step 4: Use a Vacuum to Remove Dust Insert the vacuum hose into the ducts and use slow, deliberate motions to remove as much dust and debris as possible. A HEPA-filtered vacuum is ideal for this step, as it traps fine particles and prevents them from being released back into the air. Move the hose around to reach different sections of the ductwork. Step 5: Clean the Air Filter and Replace if Needed A clogged air filter can reduce airflow and allow more dust to accumulate in your ducts. Check your filter and either clean or replace it, depending on the type you use. Regularly changing the air filter improves HVAC efficiency and helps maintain clean air in your home. Step 6: Reassemble and Turn the System Back On Once the cleaning process is complete, reinstall the vent covers and turn the HVAC system back on. Observe the airflow to ensure there are no obstructions. You should notice an improvement in air quality and efficiency immediately after cleaning. DIY vs. Professional Air Duct Cleaning When DIY Cleaning is Enough DIY air duct cleaning can be effective for minor dust buildup, especially if your HVAC system is well-maintained. If you clean air vents and change filters regularly, you may only need occasional duct cleaning. However, it’s important to be thorough and avoid damaging the ductwork during the process. When to Call a Professional (Like Air Ducts Plus More) If there is visible mold growth inside the ducts, a professional cleaning service is recommended to properly remove mold and sanitize the system. Excessive dust accumulation, pest infestations, or persistent allergy symptoms may also indicate a need for expert assistance. After major home renovations, hiring professionals ensures that construction debris and dust are fully removed from your air ducts. How to Maintain Clean Air Ducts Change Air Filters Regularly Replacing your air filter every one to three months prevents dust and debris from accumulating in the ductwork. High-quality HEPA filters are particularly effective in capturing airborne particles. Keep Vents and Registers Clean Regularly wiping down vents and registers with a damp cloth helps reduce the amount of dust circulating in your home. Keeping furniture away from vents ensures proper airflow and prevents obstructions. Schedule Routine HVAC Maintenance Annual HVAC inspections can identify early signs of duct contamination and mechanical issues. Professional maintenance can also include a more thorough air duct cleaning service when necessary. Common Mistakes to Avoid When Cleaning